I gave my older daughter BBC’s Micro:Bit as a gift for her 9th birthday. She was filled with happiness. Also i created a Tech-Christmas tree with that Micro:bit on last Christmas.
Let’s get to know BBC’s Micro:Bit board and see what it can be used for. It’s sure to be something your kids will love.
What is Micro:Bit?
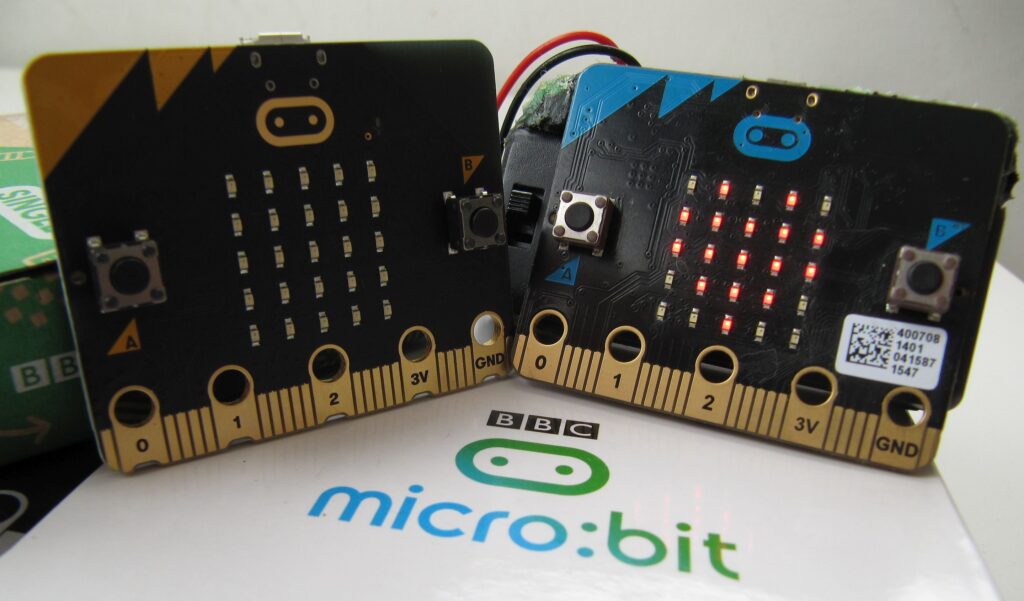
In 2015, the British BBC launched Micro:Bit, a small 4×5 cm programmable electronic card that teaches children and young people how to program in an easy and fun way. The Micro:Bit Educational Foundation, which consists of companies like Amazon, Microsoft, Cisco, Samsung etc, launched this project in 2016 to promote the learning of programming and robotics among young people worldwide.
The BBC Micro:Bit card has the following outstanding features:
- Open source: It is GNU Open Source software for both hardware and programming software development.
- MakeCode: Microsoft’s MakeCode is its own graphical programming environment. This online graphic editor has many possibilities and is free. It also offers an introduction to programming using a visual block tool. https://makecode.microbit.org
- Alternative visual programming: Programming can be done on mobile devices using the Android and iOS app. Another possibility is to program with MakeBlock and Scratch by installing an extension or addon before starting.
- Textual programming: Using Javascript textual programming in the MakeCode tool or an alternative textual environment like Python, the BBC Micro:Bit board can be programmed.
- 5×5 LED matrix: A matrix of 25 LEDs arranged in a 5×5 matrix of variable intensity with the ability to project messages, numbers and signals to the user. These can also be used to obtain the ambient lighting level.
- Push buttons A and B: Allow to detect when they are pressed and released.
- Sensors:
- Compass
- Accelerometer
- Light
- Temperature
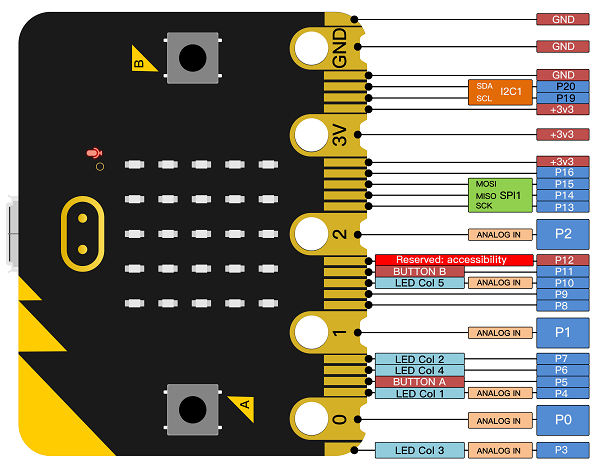
- Input and Output pins. It has 25 tiny connectors on its lower edge, with the 0,1,2, 3V and GND pins being the largest. With the latter you can use cables with alligator clip terminals that facilitate the connection to the board of all kinds of additional electronic components typical of Arduino: LEDs, servomotors, sensors, push buttons. To use the remaining pins, it will be necessary to insert the board into a shield or expansion board.
- Low-energy Bluetooth (BLE) or Radio: we can connect several Micro:Bit to each other via radio or bluetooth.
- Micro-USB connector: to power the card and download the programming to it.
- External battery connection: To run without connecting to the computer via USB, you can purchase a pack of 2 AAA batteries separately and connect them to the card.
- Speaker and Microphone
Card Diagram:

Input and Output Pins:
This is the Insta video that I shared earlier, My older child will provide an easy-to-understand explanation of how to program with it.
Developed with Block via MakeCode:
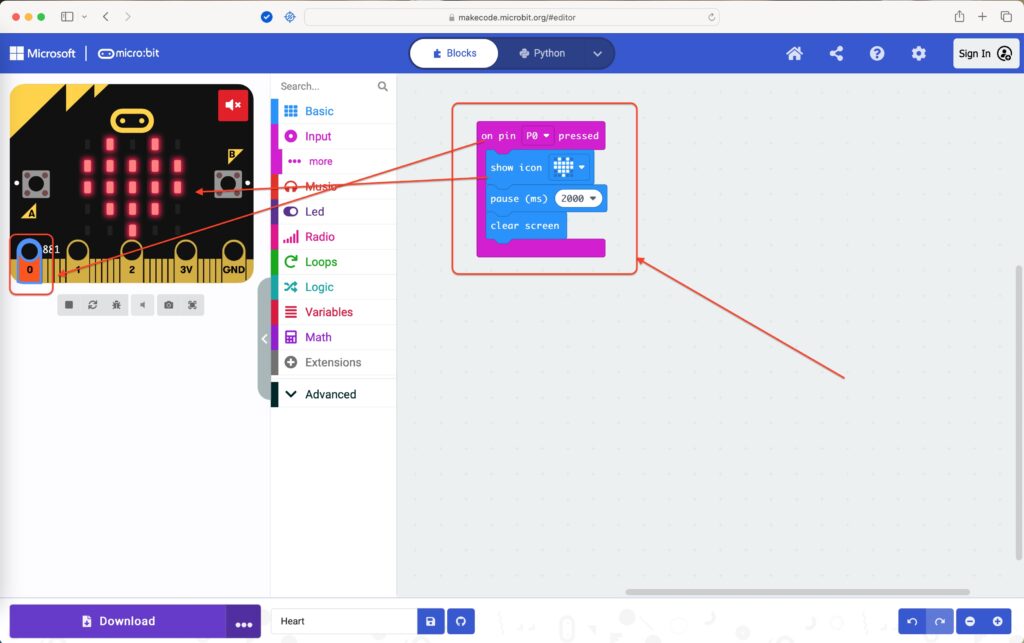
Yeah. That’s easy right?..
MakeCode is a block or JavaScript component that is used to create programs for the Micro:Bit that can be created in both Block and JavaScript. It can be accessed on the following website. https://makecode.microbit.org
Developed in Python language:
def on_pin_pressed_p0():
    basic.show_icon(IconNames.HEART)
    basic.pause(2000)
    basic.clear_screen()
input.on_pin_pressed(TouchPin.P0, on_pin_pressed_p0)
We have the ability to develop the micro:bit in Python as well, and It can be accessed on the following website. https://python.microbit.org/v/beta
What is it for?
Micro:Bit enables us to develop programs that run exclusively on the card, small video games or applications, or connect them to any of the numerous gadgets, robots, and other assemblies that have been created in the Micro:Bit ecosystem.
We can create:
- Expansion cards allow robots to be attached to sensors and motors.
- Maker assemblies, like weather stations.
- Video games that use expansion cards to act as controllers.
- New type of musical instrument
And anything else you can imagine. Microbit is an open platform that is constantly expanding and is without a doubt the most effective way to begin your journey in educational robotics.
With other electronic devices:
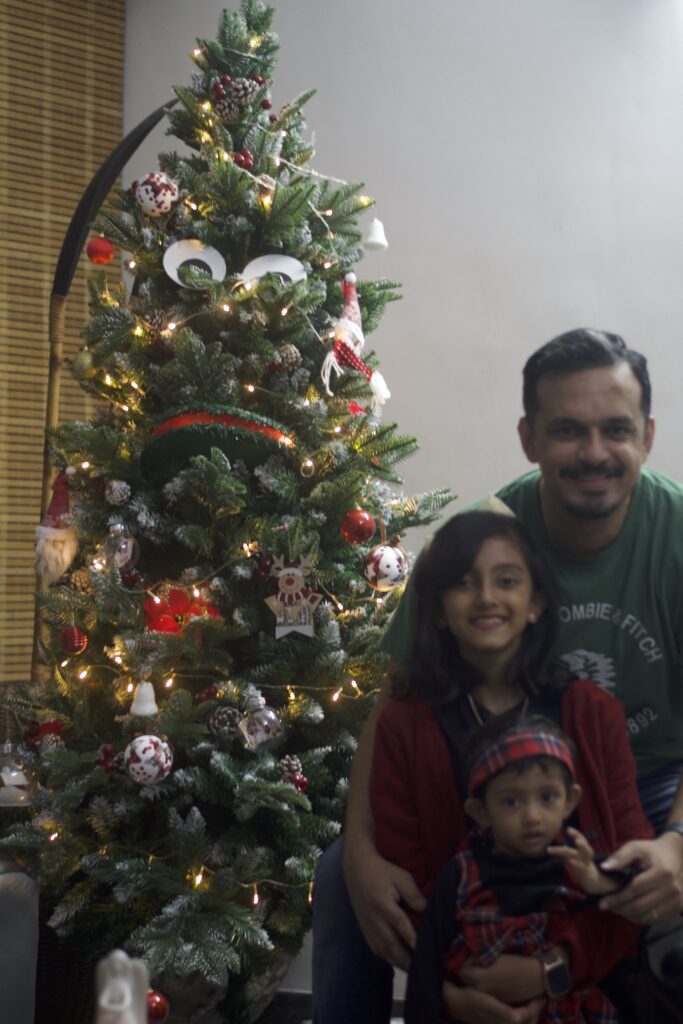
Today is November! Its time to decorate the house for next month! Lets make Tech-Christmas tree? YESSS!! Do watch another Insta video below. This tech-tree was made on last Christmas..
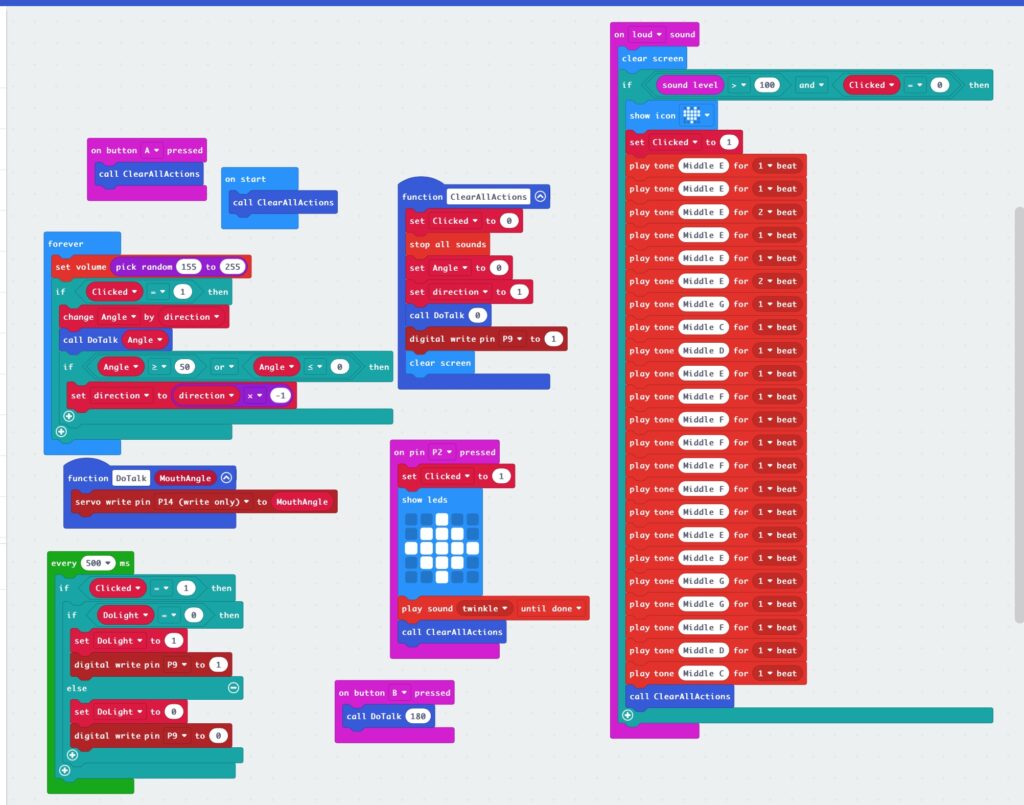
Hope you liked that Christmas tree! To make that tech-christmasy tree, I have used 3 servomotors, a few wires and a breadboard that are available on Amazon. Two servomotors are used to rotate the eyes and another one is used to close/open the mouth. And wires are used to connect to the Micro:Bit and servomotor card via a breadboard.
Here Block code:
In Python :
def DoTalk(MouthAngle: number):
    pins.servo_write_pin(AnalogPin.P14, MouthAngle)

def on_button_pressed_a():
    ClearAllActions()
input.on_button_pressed(Button.A, on_button_pressed_a)

def ClearAllActions():
    global Clicked, Angle, direction
    Clicked = 0
    music.stop_all_sounds()
    Angle = 0
    direction = 1
    DoTalk(0)
    pins.digital_write_pin(DigitalPin.P9, 1)
    basic.clear_screen()

def on_pin_pressed_p2():
    global Clicked
    Clicked = 1
    basic.show_leds("""
        . . # . .
        . # # # .
        # # # # #
        . # # # .
        . . # . .
        """)
    music.play_sound_effect(music.builtin_sound_effect(soundExpression.twinkle),
        SoundExpressionPlayMode.UNTIL_DONE)
    ClearAllActions()
input.on_pin_pressed(TouchPin.P2, on_pin_pressed_p2)

def on_sound_loud():
    global Clicked
    basic.clear_screen()
    if input.sound_level() > 100 and Clicked == 0:
        basic.show_icon(IconNames.HEART)
        Clicked = 1
        music.play_tone(330, music.beat(BeatFraction.WHOLE))
        music.play_tone(330, music.beat(BeatFraction.WHOLE))
        music.play_tone(330, music.beat(BeatFraction.DOUBLE))
        music.play_tone(330, music.beat(BeatFraction.WHOLE))
        music.play_tone(330, music.beat(BeatFraction.WHOLE))
        music.play_tone(330, music.beat(BeatFraction.DOUBLE))
        music.play_tone(392, music.beat(BeatFraction.WHOLE))
        music.play_tone(262, music.beat(BeatFraction.WHOLE))
        music.play_tone(294, music.beat(BeatFraction.WHOLE))
        music.play_tone(330, music.beat(BeatFraction.WHOLE))
        music.play_tone(349, music.beat(BeatFraction.WHOLE))
        music.play_tone(349, music.beat(BeatFraction.WHOLE))
        music.play_tone(349, music.beat(BeatFraction.WHOLE))
        music.play_tone(349, music.beat(BeatFraction.WHOLE))
        music.play_tone(349, music.beat(BeatFraction.WHOLE))
        music.play_tone(330, music.beat(BeatFraction.WHOLE))
        music.play_tone(330, music.beat(BeatFraction.WHOLE))
        music.play_tone(330, music.beat(BeatFraction.WHOLE))
        music.play_tone(392, music.beat(BeatFraction.WHOLE))
        music.play_tone(392, music.beat(BeatFraction.WHOLE))
        music.play_tone(349, music.beat(BeatFraction.WHOLE))
        music.play_tone(294, music.beat(BeatFraction.WHOLE))
        music.play_tone(262, music.beat(BeatFraction.WHOLE))
        ClearAllActions()
input.on_sound(DetectedSound.LOUD, on_sound_loud)

def on_button_pressed_b():
    DoTalk(180)
input.on_button_pressed(Button.B, on_button_pressed_b)

DoLight = 0
direction = 0
Angle = 0
Clicked = 0
ClearAllActions()

def on_every_interval():
    global DoLight
    if Clicked == 1:
        if DoLight == 0:
            DoLight = 1
            pins.digital_write_pin(DigitalPin.P9, 1)
        else:
            DoLight = 0
            pins.digital_write_pin(DigitalPin.P9, 0)
loops.every_interval(500, on_every_interval)

def on_forever():
    global Angle, direction
    music.set_volume(randint(155, 255))
    if Clicked == 1:
        Angle += direction
        DoTalk(Angle)
        if Angle >= 50 or Angle <= 0:
            direction = direction * -1
basic.forever(on_forever)
Check out more sample Micro:Bit projects here : https://microbit.org/projects/make-it-code-it/
Thank you for reading this article! ❤️
Merry Christmas in advance!
One response to “‘Micro:Bit’ board for learning programming for children”
[…] On last year, I also created a tech Christmas tree using a Microbit board, which you can check out https://wisecodes.venuthomas.in/2023/11/05/microbit-board-for-learning-programming-for-children/ […]